Impala – Truncate a Table
The Truncate Table Statement of Impala is used to remove all the records from an existing table.
You can also use DROP TABLE command to delete a complete table, but it would remove the complete table structure from the database and you would need to re-create this table once again if you wish you store some data.
Syntax
Following is the syntax of the truncate table statement.
truncate table_name;
Example
Suppose, we have a table named customers in Impala, and if you verify its contents, you are getting the following result. This means that the customers table contains 6 records.
[quickstart.cloudera:21000] > select * from customers; |
Following is an example of truncating a table in Impala using truncate statement. Here we are removing all the records of the table named customers.
[quickstart.cloudera:21000] > truncate customers;
On executing the above statement, Impala deletes all the records of the specified table, displaying the following message.
Query: truncate customers
Fetched 0 row(s) in 0.37s
Verification
If you verify the contents of the customers table, after the delete operation, using select statement, you will get an empty row as shown below.
[quickstart.cloudera:21000] > select * from customers;
Query: select * from customers
Fetched 0 row(s) in 0.12s
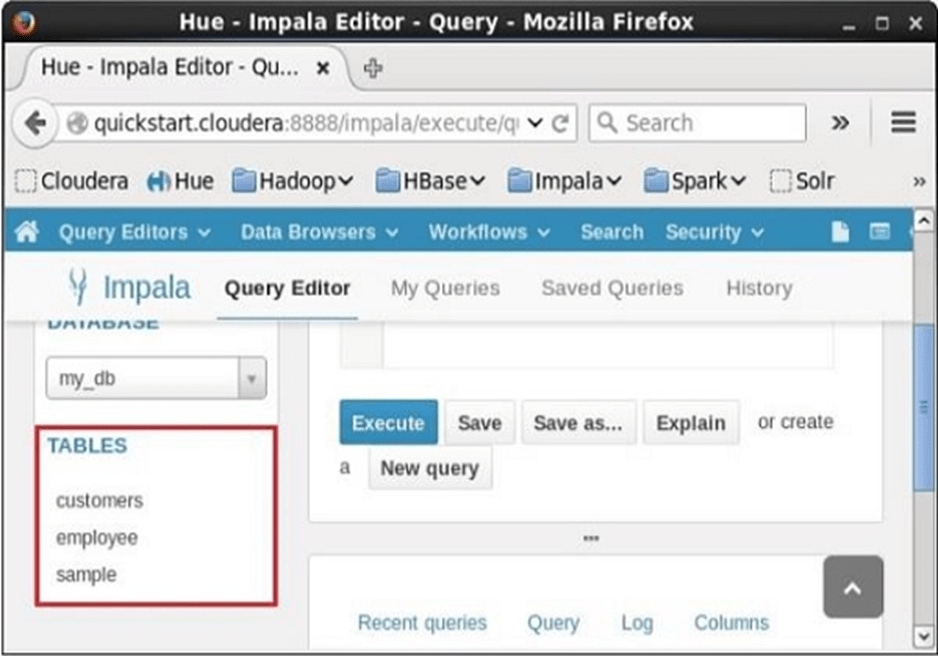
Truncating a Table using Hue Browser
Open Impala Query editor and type the truncate Statement in it. And click on the execute button as shown in the following screenshot.
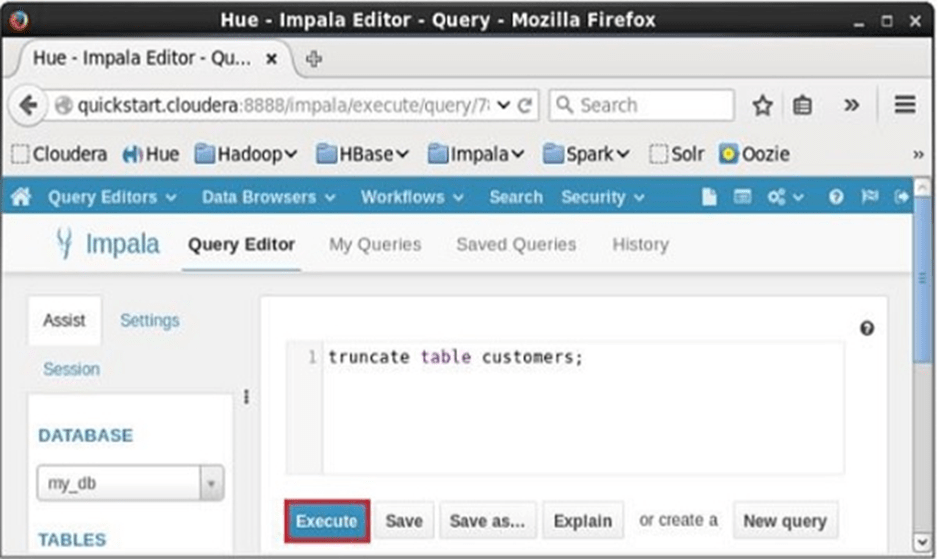
After executing the query/statement, all the records from the table are deleted.
Impala – Show Tables
The show tables statement in Impala is used to get the list of all the existing tables in the current database.
Example
Following is an example of the show tables statement. If you want to get the list of tables in a particular database, first of all, change the context to the required database and get the list of tables in it using show tables statement as shown below.
[quickstart.cloudera:21000] > use my_db;
Query: use my_db
[quickstart.cloudera:21000] > show tables;
On executing the above query, Impala fetches the list of all the tables in the specified database and displays it as shown below.
Query: show tables |
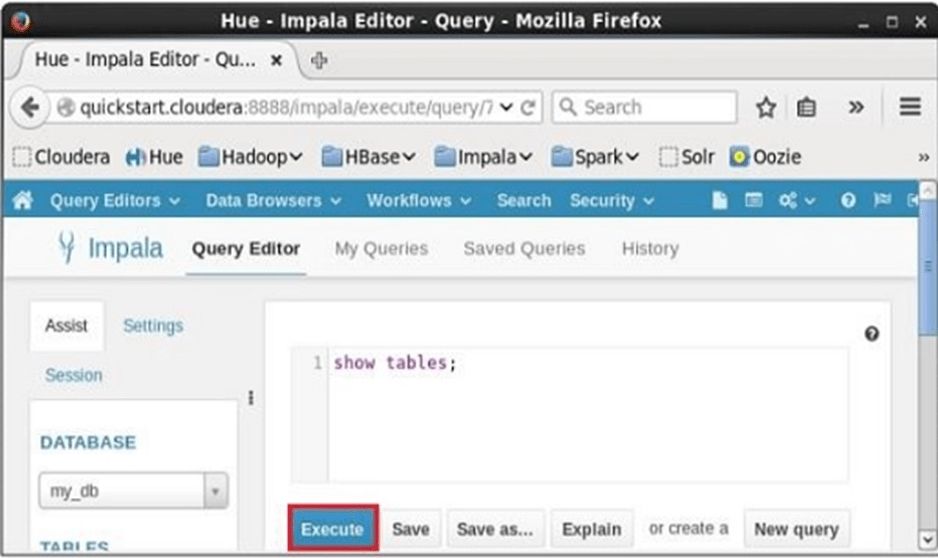
Listing the Tables using Hue
Open impala Query editor, select the context as my_db and type the show tables statement in it and click on the execute button as shown in the following screenshot.
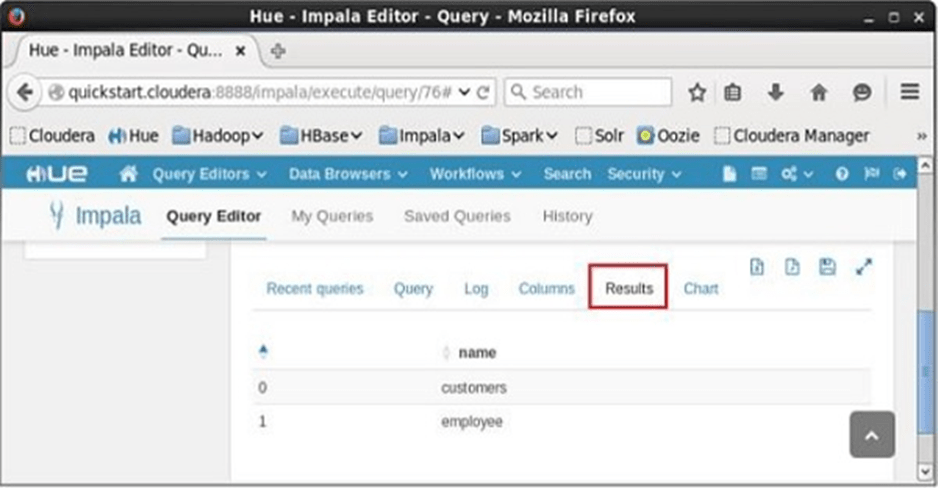
After executing the query, if you scroll down and select the Results tab, you can see the list of the tables as shown below.
Impala – Create View
A view is nothing more than a statement of Impala query language that is stored in the database with an associated name. It is a composition of a table in the form of a predefined SQL query.
A view can contain all the rows of a table or selected ones. A view can be created from one or many tables. Views allow users to −
- Structure data in a way that users or classes of users find natural or intuitive.
- Restrict access to the data such that a user can see and (sometimes) modify exactly what they need and no more.
- Summarize data from various tables which can be used to generate reports.
You can create a view using the Create View statement of Impala.
Syntax
Following is the syntax of the create view statement. IF NOT EXISTS is an optional clause. If we use this clause, a table with the given name is created, only if there is no existing table in the specified database with the same name.
Create View IF NOT EXISTS view_name as Select statement
Example
For example, assume we have a table named customers in the my_db database in Impala, with the following data.
ID NAME AGE ADDRESS SALARY |
Following is an example of Create View Statement. In this example, we are creating a view as customers table which contains the columns, name, and age.
[quickstart.cloudera:21000] > CREATE VIEW IF NOT EXISTS customers_view AS select name, age from customers;
On executing the above query, a view with the desired columns is created, displaying the following message.
Query: create VIEW IF NOT EXISTS sample AS select * from customers Fetched 0 row(s) in 0.33s
Verification
You can verify the contents of the view just created, using the select statement as shown below.
[quickstart.cloudera:21000] > select * from customers_view;
This will produce the following result.
Query: select * from customers_view |
Creating a View using Hue
Open Impala Query editor, select the context as my_db, and type the Create View statement in it and click on the execute button as shown in the following screenshot.

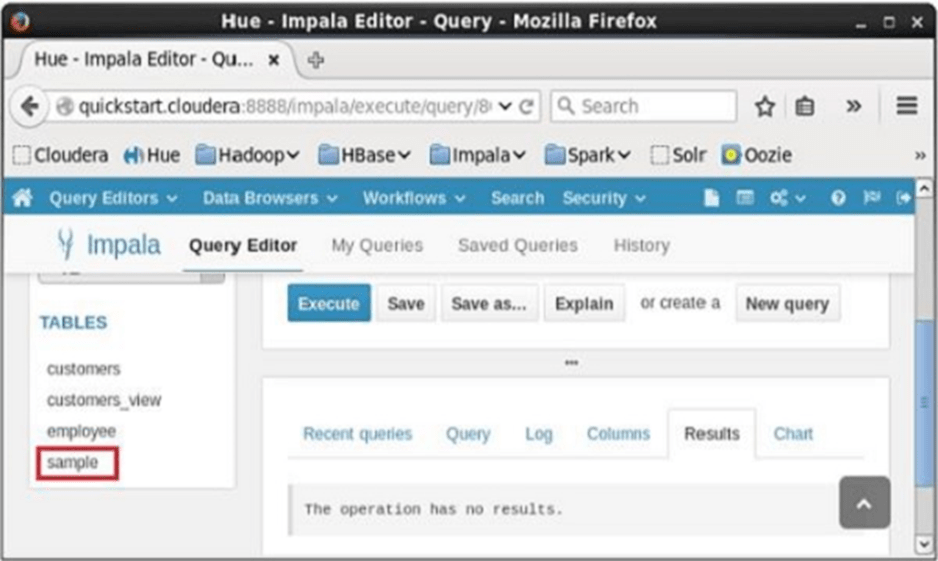
After executing the query, if you scroll down, you can see the view named sample created in the list of tables as shown below.
Impala – Alter View
The Alter View statement of Impala is used to change a view. Using this statement, you can change the name of a view, change the database, and the query associated with it.
Since a view is a logical construct, no physical data will be affected by the alter view query.
Syntax
Following is the syntax of the Alter View statement
ALTER VIEW database_name.view_name as Select statement
Example
For example, assume we have a view named customers_view in the my_db database in Impala with the following contents.
+----------+-----+ |
Following is an example of Alter View Statement. In this example, we are including the columns id, name, and salary instead of name and age to the customers_view.
[quickstart.cloudera:21000] > Alter view customers_view as select id, name, salary from customers;
On executing the above query, Impala does the specified changes to the customers_view, displaying the following message.
Query: alter view customers_view as select id, name, salary from customers
Verification
You can verify the contents of the view named customers_view, using the select statement as shown below.
[quickstart.cloudera:21000] > select * from customers_view; |
This will produce the following result.
+----+----------+--------+ |
Altering a View using Hue
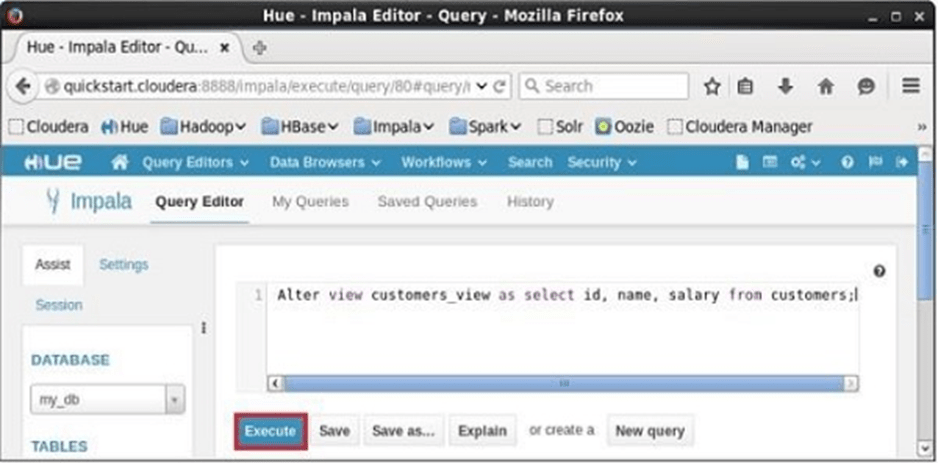
Open Impala Query editor, select the context as my_db, and type the Alter View statement in it and click on the execute button as shown in the following screenshot.
After executing the query, the view named sample will be altered accordingly.
Impala – Drop a View
The Drop View query of Impala is used to delete an existing view. Since a view is a logical construct, no physical data will be affected by the drop view query.
Syntax
Following is the syntax of the drop view statement.
DROP VIEW database_name.view_name;
Example
For example, assume we have a view named customers_view in the my_db database in Impala with the following contents.
+----------+-----+ |
Following is an example of Drop View Statement. In this example, we are trying to delete the view named customers_view using the drop view query.
| [quickstart.cloudera:21000] > Drop view customers_view; |
On executing the above query, Impala deletes the specified view, displaying the following message.
Query: drop view customers_view
Verification
If you verify the list of tables using show tables statement, you can observe that the view named customers_view is deleted.
[quickstart.cloudera:21000] > show tables;
This will produce the following result.
Query: show tables |
Dropping a View using Hue
Open Impala Query editor, select the context as my_db, and type the Drop view statement in it and click on the execute button as shown in the following screenshot.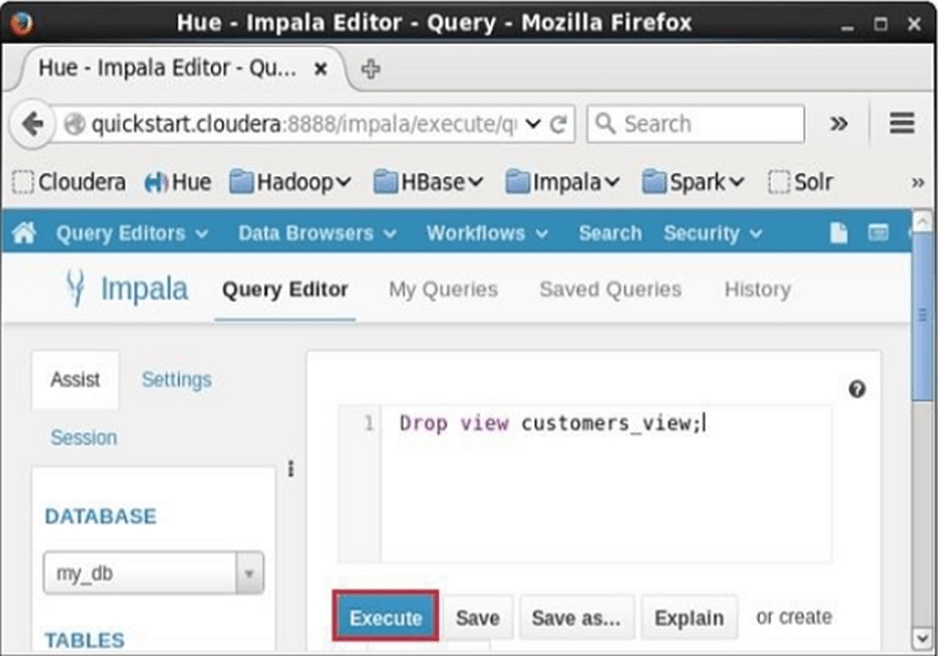
After executing the query, if you scroll down, you can see a list named TABLES. This list contains all the tables and views in the current database. From this list, you can find that the specified view was deleted.